
Google Ads Enhanced Conversions (or GEC) is Google’s version of Facebook CAPI. It uses hashed user data to capture conversions that would otherwise be lost due to ad tracking-blocker technology.
In this article, you’ll learn the 4-steps to implement Google Enhanced Conversions with Google Tag Manager Server-side. I recommend avoiding the Global Site Tag method because it’s a browser-based solution (read more about this below).
Prerequisites
Before attempting this method, make sure you have the following already set up:
Google Tag Manager web container with tags:
- Google Analytics 4 configuration
- Google conversion linker
Google Tag Manager server-side container with tags
- Google Ads conversion tracking tag
- Google conversion linker
A little background around why solutions like Enhanced Conversions are growing increasingly important…
The iOS14 Debacle
Recently, we saw the advent of iOS14 and its new privacy protocols, blocking all 3rd-party cookies and shortening the expiration time of 1st-party cookies to just one week.
Apple further stipulated that Facebook had to limit the extent of events and data extracted from users on iOS and Safari devices.
Apple had two main reasons for its actions:
- Facebook makes a LOT of money from Apple’s users’ data (and wasn’t giving Apple a kickback). Similarly, Google misses out on massive potential revenues from data Facebook gets from Android devices.
- People were gradually waking up to the fact that their personal info, browsing habits, location, and purchasing behavior were being passed onto goodness-knows-who to do goodness-knows-what.
Look to the “Cambridge Analytica” saga to get a sense of just how user data can be misused.
This set in motion a series of dominoes that are seeing the likes of Android and browsers like Brave, Opera, Firefox, and even Chrome starting to take similar stances on privacy by tightening up the data available to third-party trackers.
What this means for digital advertisers is it’s getting harder to know what’s really going on with marketing campaigns.
Insights from Facebook CAPI
The way Facebook handled iOS14 is interesting because it was the first to come up with a comprehensive response to iOS14… probably because they were the most affected and stood to lose the most.
Conversion API had been available for 2-years prior, but most advertisers stuck with the Facebook Pixel because it was MUCH easier to set up.
CAPI, a server-to-server tracking solution involves passing hashed personal info such as name, email, mobile, zip, city, state, country, and user-agent, to create a redundant conversion data stream in case of having conversion tracking blocked in users’ browsers.
Based on results we’ve seen from clients, we estimate around 17% or more of data is blocked in browsers and devices, and FB CAPI does a solid job of filling in a good chunk of these missing pieces.
Server-Based vs Browser-Based Tracking
iOS, Android, browsers, and ad blockers will continue to tighten up privacy by blocking connections between users’ devices and external 3rd-party trackers… likely due to increasing pressure from pro-privacy groups who eagerly litigate the tech giants when they overstep the mark.
Apple, Android, Brave, Opera, and other platforms harness the power of Machine Learning to detect tracker footprints and then start blocking them. So over time, we can expect browser-based tracking solutions to become less and less reliable.
However, these same technologies will not block the devices from sending data back to the same root web domain that a user is visiting. The reason for this is devices and servers need to be in regular communication for modern websites to function correctly. If this behavior stopped, then probably 80% of all websites would stop working!
Herein lies the power of server-based tracking… by sending customer data and transaction data to a server on your root domain (e.g. sgtm.yourdomain.com), you can forward that same data to any endpoint of your choosing, including Google Ads, Facebook Ads, Tiktok Ads, Pinterest Ads, Universal Analytics, Google Analytics 4, and more.
For the time being, this type of tracking technology can’t be blocked.
Why GEC with Global Site Tag is Kind of Pointless
You could theoretically implement Enhanced Conversions using GTM browser OR Global Site Tag if you really wanted to. Both are possible. But, for the aforementioned reasons, doing so is kind of pointless.
Remember, any tracking technology that runs in the browser can easily be blocked, which means you’ll lose ever more conversion measurement data.
In short, Enhanced Conversions MUST run from the server in order to do it’s job properly (and Google Tag Manager Server-side is an excellent way to do this).
Reliable Data Matters
There are two COMPELLING reasons for going to lengths to collect complete, reliable data.
The first is reporting. When blending data from ads, CRM, shopping carts, and other sources, the more accurate your reports and dashboards will be. In short, you’ll be clearer about what’s happening in your growth engine.
Second, the Ad Platforms’ A.I. that auto-automizes your ads all require CLEAN data.
Junk in ==> junk out.
The better quality signals you give the robots to work with, the better results they will deliver in the form of quality traffic.
Why Google Released Enhanced Conversions
I watched bemused as Facebook tore it up in the process of rolling out Facebook CAPI. At the time, it was obvious that they panicking.
iOS14 basically turned the ad world upside down!
I had in-depth discussions with several high-rolling digital media buyers, trying to get a bead on what iOS14 and CAPI would eventually mean for advertising.
Meanwhile, we didn’t hear a peep from Google. It’s almost as if they didn’t care.
Somehow, we thought, Google must have had this sewn up with their World-class predictive modeling… and from what we saw, Youtube Ads appeared to be far less affected than Facebook, even with advertisers running CAPI.
But as the months passed by, we saw CAPI improve. Probably because it took a while for their Machine Learning to adapt to the new data sets.
In the past, if you wanted to send server-side conversion data you’d have to go through the hassle of applying for Google Ads API access.
So, it was a nice surprise to finally see Google Ads roll out their own GTM version of CAPI with Enhanced Conversions.
How Google Enhanced Conversions Work
Similar to Facebook CAPI, Enhanced Conversions hashes customer data- email address, phone, first name, surname, street, city, region, country, postcode and combines it with IP address, user-agent, and other data from Google Analytics 4.
It shouldn’t surprise us to hear that Google cross-references user account data across gmail, Youtube, Workspaces, and hundreds of other product accounts in order to attribute a conversion action back to a specific Google Ad.
As far as we know, because the data is hashed using the SHA256 algorithm, theoretically user personal info is protected under GDPR and CCPA laws.
Personally, I’m highly skeptical about their claims… My theory is that Facebook and Google have the smarts to know who a specific user is, regardless of whether personal data is encrypted or not.
4-Steps to Implement Enhanced Conversions using Google Tag Manager
As I mentioned at the beginning, this article is going to get REALLY long if I have to explain how to set up Google Tag Manager, GTM Server-side, and Google Analytics 4. I’ll link to each topic as I create a separate in-depth article for each one.
Now that you understand why we’re doing things the way we are, let’s go through the actual steps. It’s quite simple as long as you’re already collecting data from your system and storing them as data layer variables in GTM.
Here’s a basic overview of what we’re doing:
Turn on enhanced conversions in Google Ads dashboard
Collect user provided data
Send data from GTM web container to GTM server container
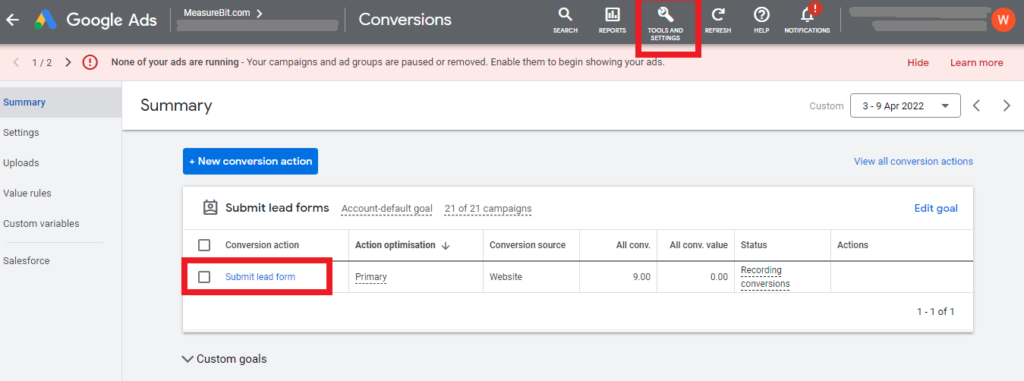
STEP 1. Google Ads Conversion Settings
Login to your Google Ads account – https://ads.google.com/
In the top navigation, click “Tools & Settings”.
Under the “Measurement” submenu, click “Conversions”.
Then click the link for the conversion you want to enable for Enhanced Conversions.
Scroll to the bottom and toggle the option labeled “Turn on enhanced conversions” and choose Tag Type “Google Tag Manager”.
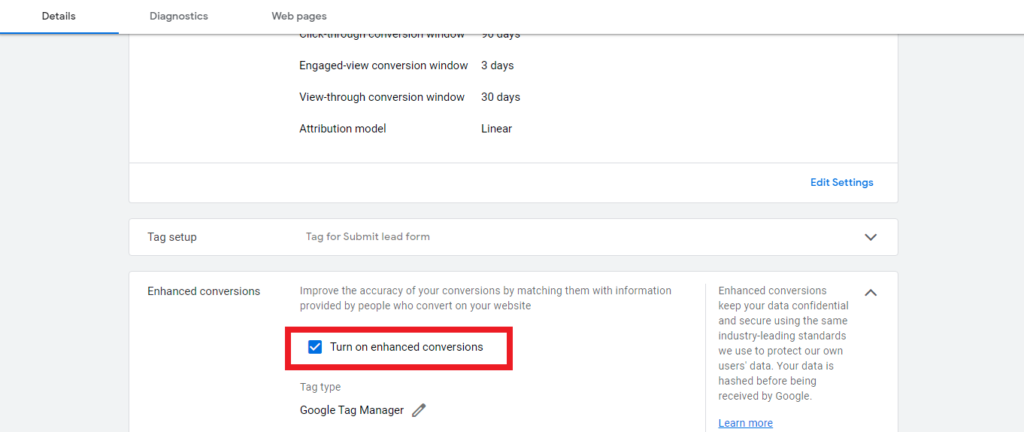
The system will ask you to enter the URL where you have Google Tag Manager installed.
Input your URL and click the “Check URL” button. Then Google will go check and verify that you have a valid GTM setup.
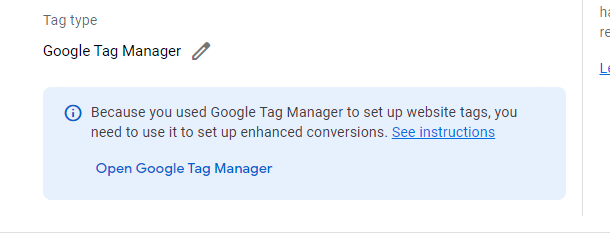
If successful, you’ll see the following message in a light blue box, indicating you have Google Tag Manager installed.
Once that’s done, it’s time to feed user provided data to Google Ads.
STEP 2. User-Provided Data Variable
Google stipulates this the minimum data required to make Google Enhanced Conversions work:
Phone number (must be provided in addition to one of the other two pieces of information above)
Email address (preferred)
Name and home address (street address, city, state/region and postcode)
The upshot is, you must have the phone number, plus the email address and / or the full home address (street, city, state, country, postcode).
If you’re missing the minimum dataset, the conversion will fire as it does normally, but you won’t get the additional benefit of GEC matching events based on personal customer data.
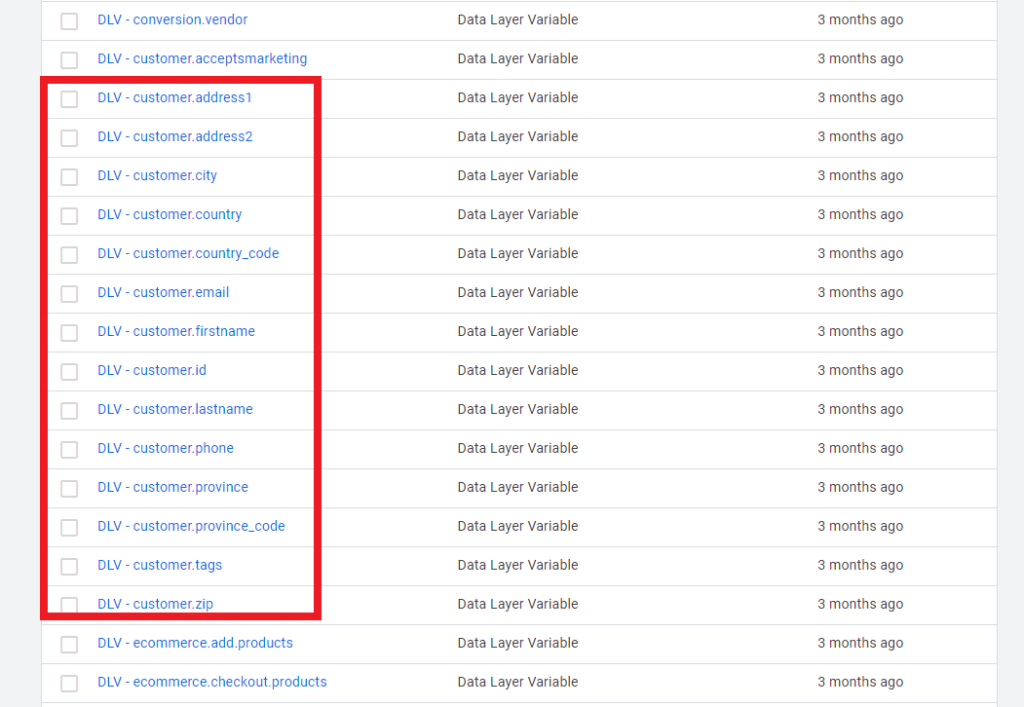
Login to Google Tag Manager account – https://tagmanager.google.com/
If you don’t already have them in your GTM web setup, you’ll need to create data layer variables for email, phone, first name, surname, street, city, region, country, and postal code. My customer data layer variables look like this:
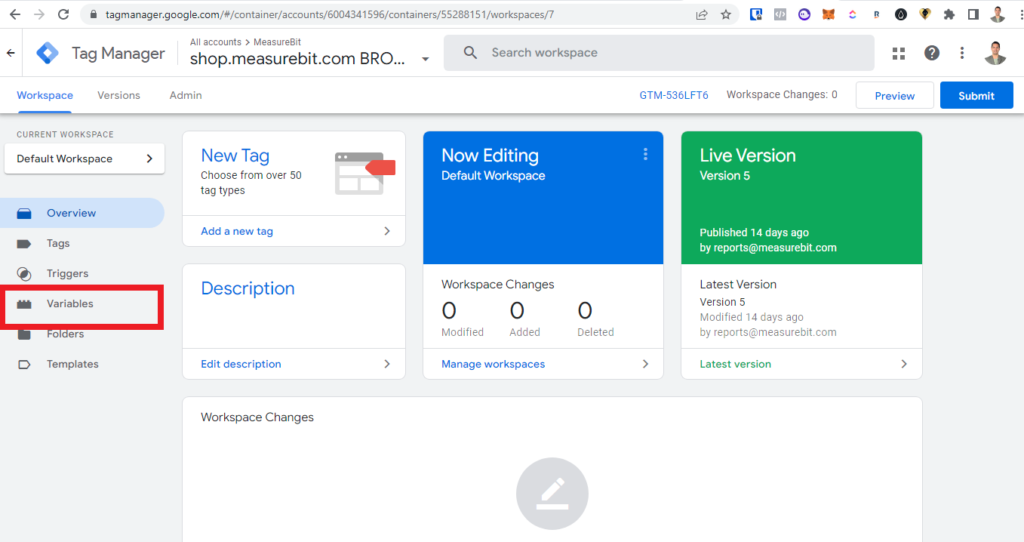
Click the “Variables” link on the left side panel.
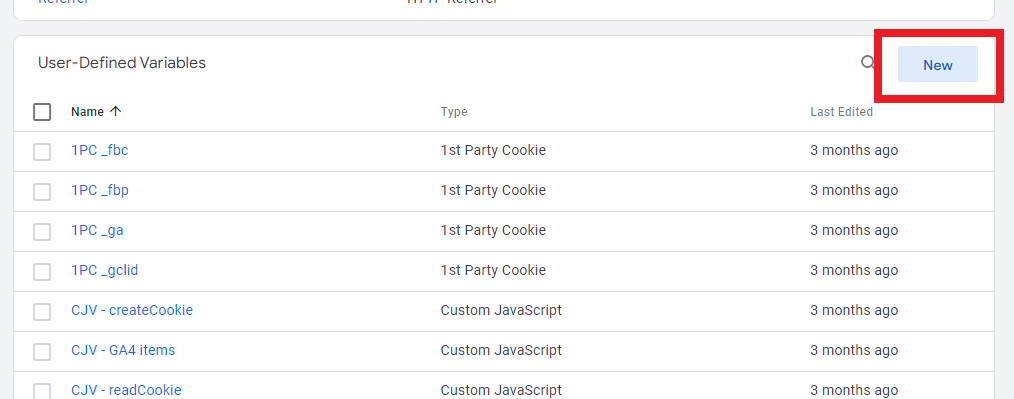
Under “User-Defined Variables” heading, click the “New” button.
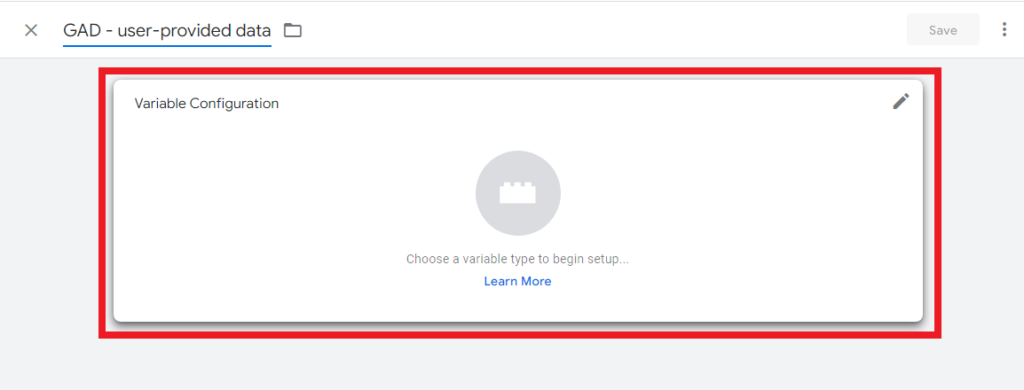
Give the tag a meaningful name, indicating that it’s to do with Google Ads and also “user-provided data”. The naming convention for tags, triggers, and variables is surprisingly important. It keeps GTM containers organized and helps with future maintenance. So try to be consistent!
Click “Variable Configuration” to reveal a dropdown menu.
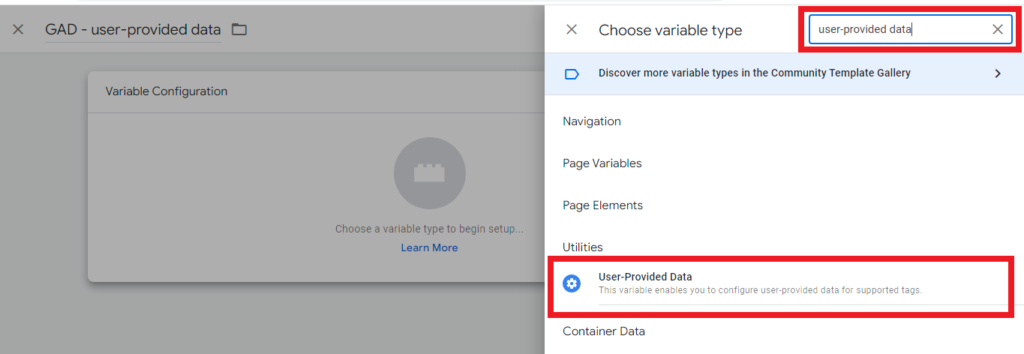
In the top-right search box, type “user-provided data”. As you begin typing, you’ll see the variable appear in the search results. Click to add this variable type to your GTM browser container.
Next, click each box for email address, phone, first name, etc, and add the corresponding data layer variables from the dropbox list that appears. Note – the “Region” field expects state or province in capitalized 2-digit format (e.g. Arizona is represented by AZ).
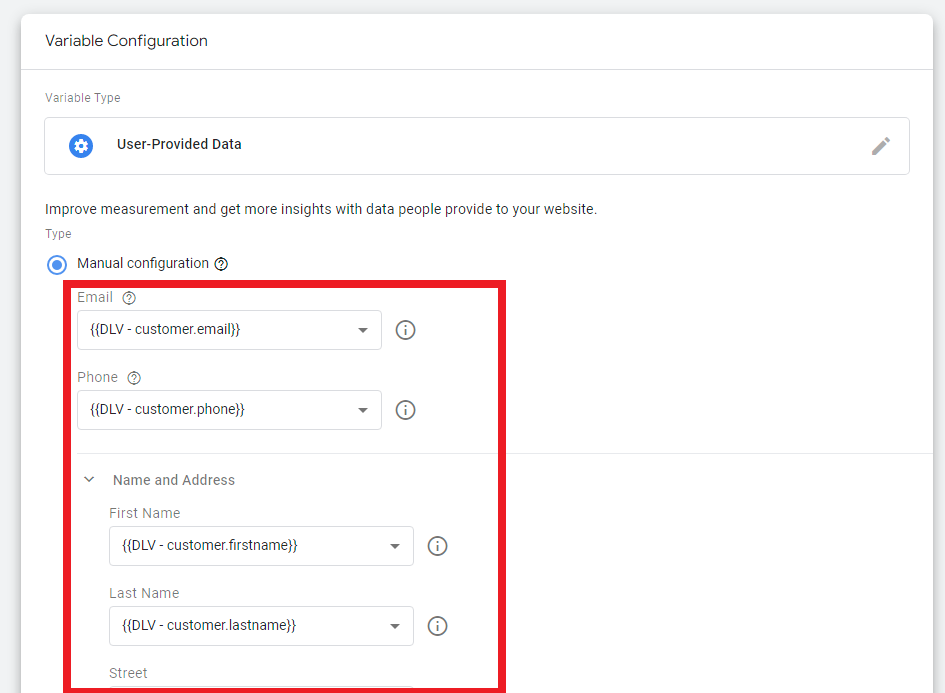
If you’re having trouble saving the changes, it’s because the User-Provided Data variable expects a value for ALL of the variables. It won’t save unless all of the fields contain a value.
At this point, you’ve created a special variable containing all of the parameters Google Enhanced Conversions needs in order to attribute events to the right source.
Now, we must somehow get this data to Google Tag Manager Server-side and the easiest way to accomplish this is with Google Analytics 4.
STEP 3. GA4 Tag Settings
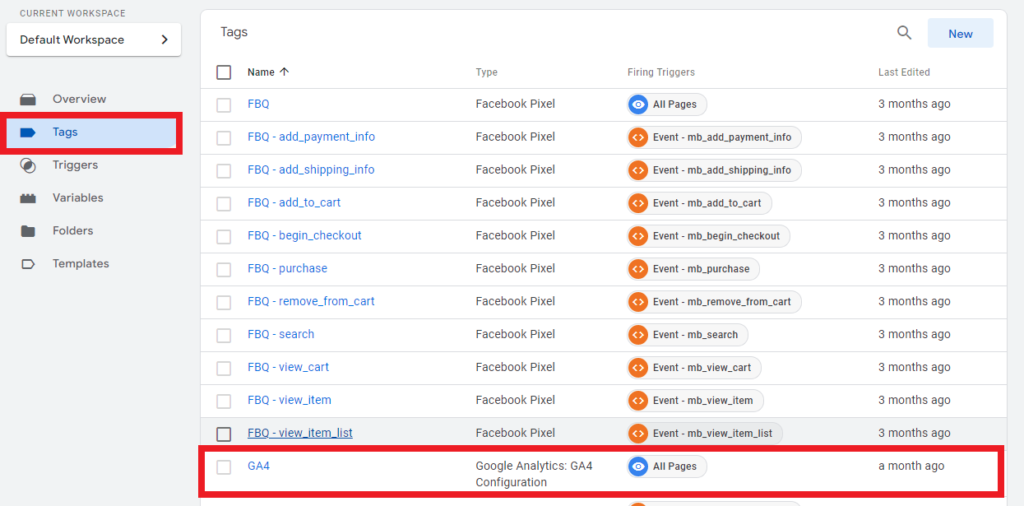
Click “Tags” in the right sidebar. Then click and open the Google Analytics 4 configuration tag.
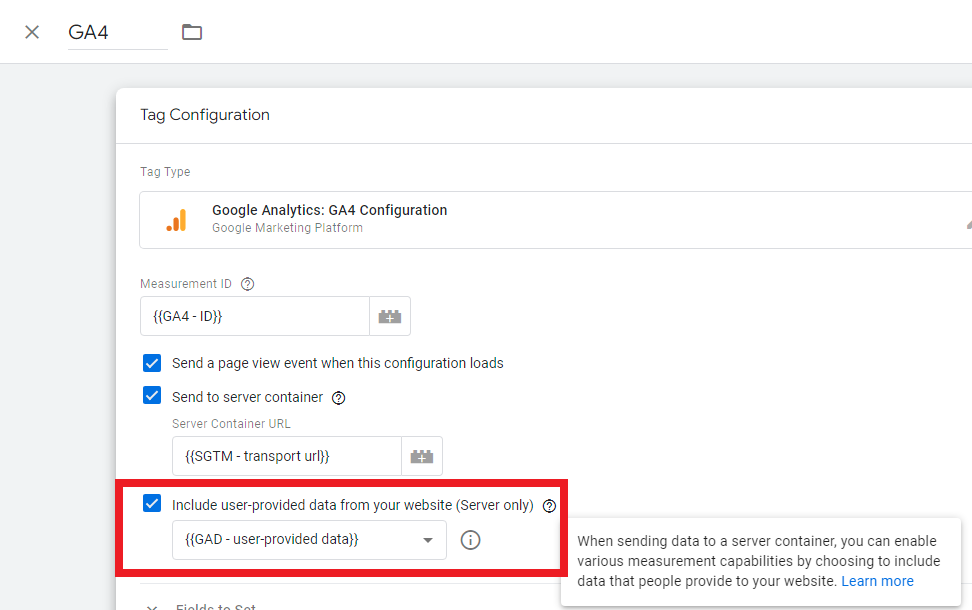
Toggle the checkbox labeled “Include user-provided data from your website”.
From the dropbox menu select the variable User-Provided Data variable you just created in STEP 1 and click “Save”.
So far we’ve completed all the necessary steps for GTM Browser-side. Finally, we have one last option to configure in Google Tag Manager Server-side.
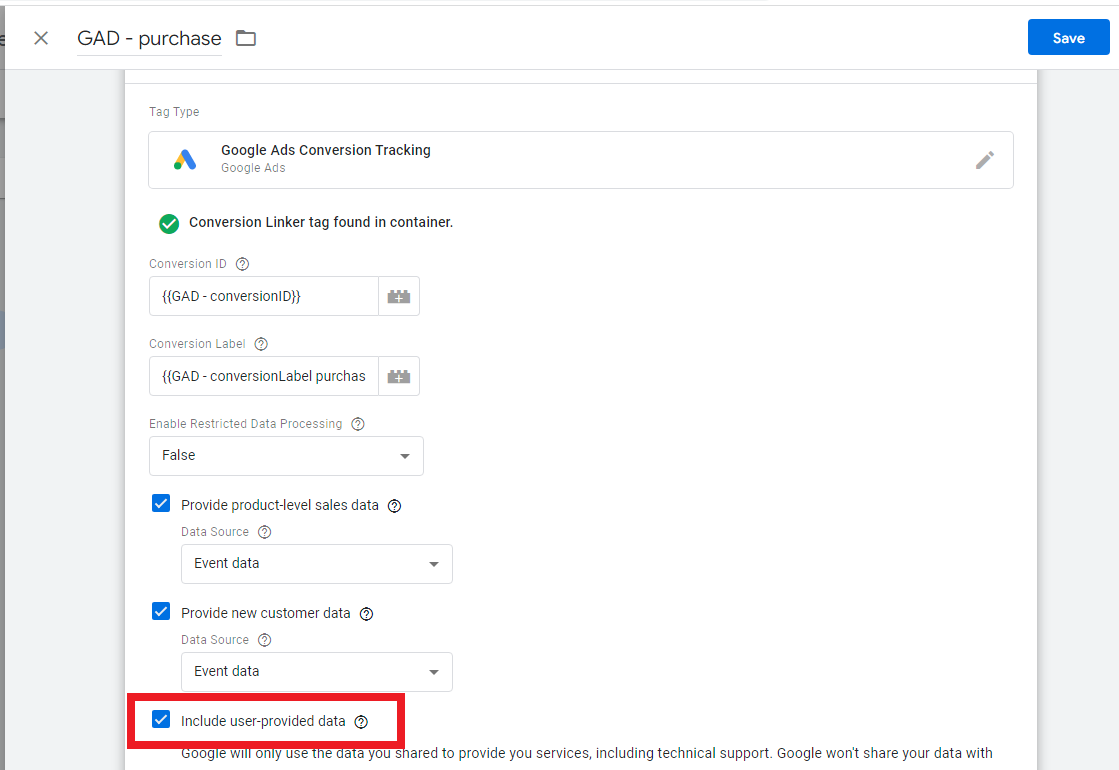
STEP 4. GTM Server-Side Google Ads Tag Settings
Login to Google Tag Manager Server-side container, click the “Tags” link in the left side panel, and open the Google Analytics conversion Tag.
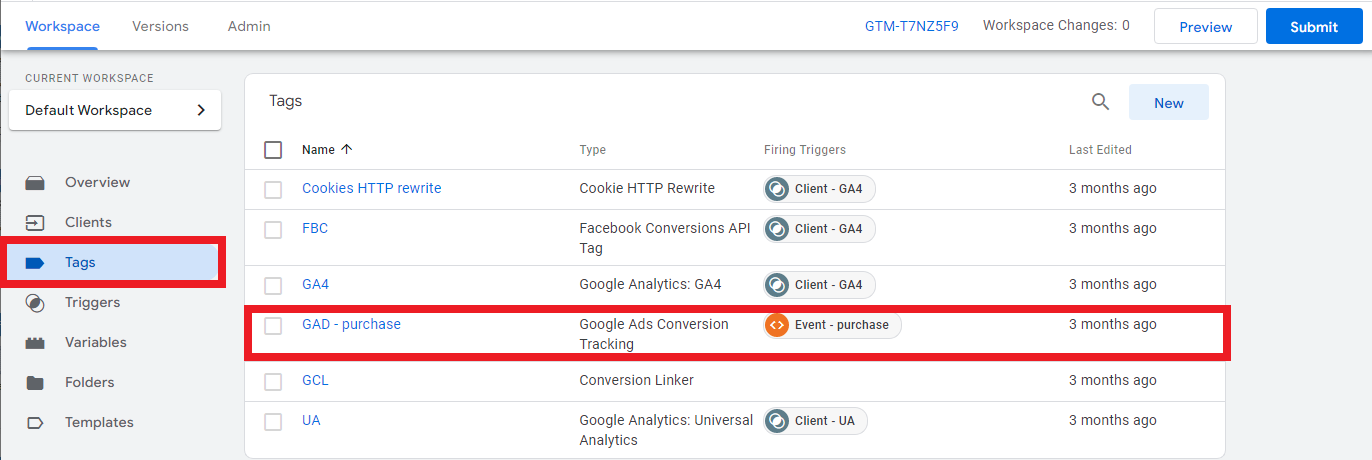
Toggle the checkbox labeled “Include user-provided data”.
Conclusion
To summarize, Google Enhanced Conversions is relatively quick and simple to set up as long as you already have Google Tag Manager Browser and Server-side, along with GA4 and Google Ads tags properly configured.
If you’ve just started down this path of server-side tagging, congratulations!
You’re well on your way to improving ad reporting and ad optimization. You’ve also taken some important steps along the way to building your own first-party customer data platform.
Next Steps
If you need help with any of these steps, drop us a line. We have a team of professionals whose sole job is to solve tricky conversion tracking issues for Google Ads, Facebook Ads, Shopify, Google Shopping, WordPress, Woocommerce, Woofunnels, Squarespace, Clickfunnels, and more.
0 comments